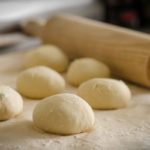
How to Bake Pizza in the Oven Without a Pizza Stone
As pizza lovers, I think we all know that the best way to cook a pizza is in a wood-fired pizza oven. Or maybe with a pizza stone when the oven isn’t available.
But what do you do when you are at a friend’s house and they don’t have the kit you need? Can you still make a delicious pizza?
The answer is yes, you can still make amazing pizzas in your oven without a pizza stone – and I’m here to show you how! With just some simple ingredients and tools, plus my foolproof methods, you’ll be enjoying homemade pizzas with perfectly crisp crusts in no time.
So let’s start with our very first pizza stone alternative.
Using cookie trays
My first suggestion when baking pizza without a stone is to use cookie trays. These are commonly found in every kitchen and do a great job of helping the pizza cook evenly.
To begin, preheat the oven to its highest temperature — typically 500 degrees Fahrenheit or higher. When it is fully preheated, lightly brush some olive oil on the cookie tray and then place the pizza dough on top. Bake for 10 minutes or when you see the crust turns golden brown. Take the pie out of the oven, let it cool down slightly, and enjoy.
Try some fire bricks out
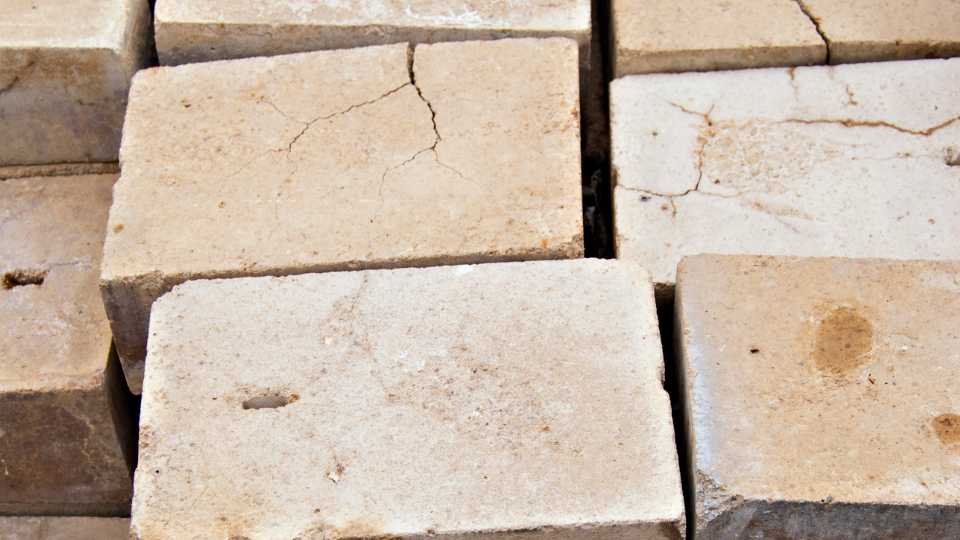
If you’re looking for an alternative to a pizza stone, fire bricks are the best option. They are made from refractory ceramic material, which is designed to withstand temperatures up to 2200°F, making them much more effective at baking crisp and delicious pizzas than a traditional pizza stone.
To use them, start by laying out the bricks on some baking sheets inside the cold oven. Make sure that the bricks are placed close together for optimal results. Once you have them in place, preheat the oven to 425°F and let it be at this temperature for 45 minutes so that the bricks can heat up evenly.
When the preheating is complete, your fire brick-lined oven is ready for your pizza! Place your pizza on top of the hot bricks and bake according to your recipe’s instructions. Keep a close eye on it while it’s cooking, as the high heat generated by the fire bricks can cause food to burn faster than usual. When it’s done baking, pull it out with some oven mitts or a large spatula and enjoy your freshly baked crisp pizza!
The inverted cooking sheet trick
This trick is simple, but it works super well! All you need is a regular-rimmed baking sheet. Before you preheat your oven, take the baking sheet and invert it to the lowest shelf of your oven. Once the oven is preheated and ready to go, slide your pizza onto the hot baking sheet surface. The heat from the inverted baking sheet will help make your pizza nice and crisp. Plus, having your baking sheet upside down makes it easier to take the pizza out of the oven when it’s done.
When using this method, make sure that your baking sheet has no loose pieces that could fall off while in use as they may present fire hazards if they come into contact with heating elements or other hot surfaces in the oven.
Using cast-iron skillet
If not owning a pizza stone at home, a cast iron skillet is a creative option for baking pizza you should know about. The easiest solution is to turn your skillet upside down. This way, you can use its base as a unique pizza stone. Now, it’s time to turn on the oven to a high temperature and wait for 20 minutes until it’s preheated.
Next up, I will often place my skillet in the center of the oven and wait for another 10 minutes until it gets really hot. When the heat radiates itself, it’s time to place your pizza on top. Then wait for the magic to happen to the crust!
Try baking your pizza on a grill
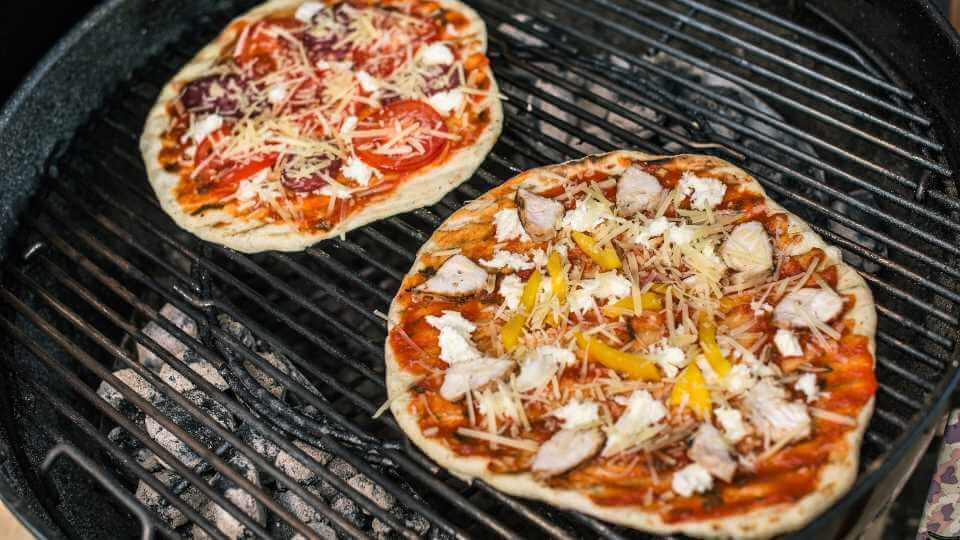
I’m the kind of person who loves to cook, and I’m especially obsessed with grilled pizza. There’s just something about that charred crust that takes regular pizza up a notch. Grilling pizza is incredibly simple, and it can be done with either a gas or charcoal grill. All you need is some fire-resistant gloves, a few tools, and the right ingredients.
First off, make sure your grill is nice and hot – you want it to be around 500 degrees Fahrenheit for optimal crispy-crust results. Once the grill is preheated, put on your protective gloves and give the grates a good scrub with a wire brush. This will help prevent sticking when you put the dough on later.
Now we’re ready to get cooking! Start off by rolling out your dough onto parchment paper until it’s around 1/4 inch thick. Make sure to sprinkle it with some cornmeal to help prevent sticking before transferring it onto the grill grates. I recommend you use a large metal spatula or baking sheet to place the dough onto one of the hotter sections of the grill. Let it cook for 2 minutes on each side until golden brown, then remove from heat and transfer back to parchment paper or cutting board.
At this point, you can add sauce, cheese, and any other toppings you like before returning it to the hot section of your grill for another two minutes per side – just keep an eye on things so nothing burns! Finally, remove from heat one last time before slicing into delicious wedges for serving.
Try using a Dutch oven instead
When I’m looking to make a quick restaurant-perfect pizza, nothing beats a Dutch oven. A Dutch oven is an incredibly versatile cooking tool made of cast iron, which conducts heat evenly and retains it better than other materials. This means that it can easily replicate the temperature and texture of a traditional pizza stone – but without having to fire up the oven.
To get started, preheat your Dutch oven over medium-high heat on the stovetop. When it’s hot enough (around 430-450°F or 220-230°C), add some olive oil and drop in your pizza dough. Cook on one side for about two minutes or so, then flip it over and cook for another two minutes until the bottom is crispy. You can use tongs or a spatula to flip it if needed. Once you’re happy with the underside of your pizza, carefully transfer it onto parchment paper in the Dutch oven before adding all your desired toppings.
Because Dutch ovens are made from cast iron, they can conduct heat far more efficiently than a traditional pizza stone would be able to while using less energy overall. This means that you don’t need to turn up the temperature as high as you might have to with using an actual stone either in an oven or on the stovetop – making sure that your toppings don’t burn while still achieving the perfectly crisp crust that we all know and love!
Once all of your toppings are added and settled into place, put on the lid of your Dutch oven and cook until everything is nice and melted together – usually around five to seven minutes depending upon how hot you set your stovetop earlier on. Finally, expose each pizza slice one by one by lifting off the lid – careful not to let any steam escape – so that each bite gets cooked through properly before serving them up for dinner!
Let’s bring out your pizza pans

When it comes to baking crisp pizza, I’ve found that using pizza pans is an easy and reliable way to achieve the perfect crust. Unlike an oven with a pizza stone, which can be tricky to master, pizza pans are relatively straightforward to use — even for novice bakers.
If you’re going to go the pan route, I recommend buying heavy aluminum pans that have air vents or a ridged design – this will allow airflow under the dough, promoting a crisp texture. Avoid non-stick surfaces as these tend to steam instead of crisp.
For the best results, preheat your oven before popping in your pizza, and make sure you use plenty of olive oil on the pan. This will help create a nice golden brown crust that is both crunchy and chewy. It also prevents sticking — a common problem when using pans instead of stones!
When it’s time to bake your pie, place the pan directly on one of the middle racks — usually two-thirds up from the bottom. Then bake at maximum temperature (usually 500°F) until the crust looks golden brown and the cheese has melted. The exact baking time depends on how thick your dough is, but generally speaking, it should take between 8–12 minutes.
And there you have it: baking delicious pizzas with perfect golden crusts doesn’t have to require complicated tools or techniques! All you need is some heavy aluminum pizza pans and an oven set to maximum heat — no stone necessary!
Tiles to the rescue!
Believe it or not, baking pizzas with tiles is a great way to get that crispy crust without having to use a pizza stone! To start, I often preheat the oven and place the tiles onto a baking sheet. The thickness of the tiles helps promote even heat distribution and ensures that all areas of the pizza will have an even bake.
I then place my desired toppings onto the rolled-out dough and slide it onto the tiles in the preheated oven. Depending on how thick I made my dough, I’ll reduce or increase cooking time accordingly. As soon as the pizza is golden brown, it’s ready to come out of the oven!
Using tiles instead of a pizza stone will give you a perfectly crisp and delicious crust every time, plus you don’t have to worry about damaging a pricey stone. Plus, if you buy unglazed quarry or terracotta tiles, they are much more affordable than purchasing a regular pizza stone.
Why not try cake tins?
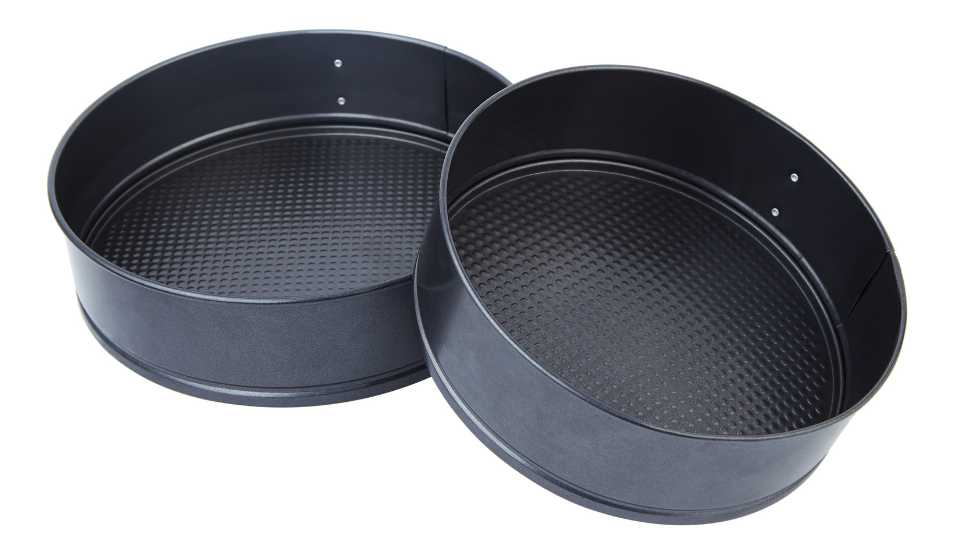
My last tip is all about making a crisp pizza with cake tins. It’s surprisingly easy – all you need is the right equipment and knowledge.
To start, you’ll need a high-quality cake tin made from iron or steel, as this type of pan offers the best heat retention and will produce evenly cooked pizzas. Make sure it has thick walls and a base to ensure your pizza doesn’t burn. Also, if possible, try to use a non-perforated version – this will prevent any excess moisture from seeping out, resulting in better crusts.
Next, preheat the pan before adding your pizza dough. This is important for achieving a crispy texture: the hotness of the pan will immediately begin cooking the crust as soon as it’s placed in. When preheating the tin, make sure you don’t heat it too much or you’ll risk burning your pizza!
Once your pan is preheated, cover it with parchment paper (it should fit snuggly inside) and then place your dough on top. Add desired toppings such as cheese, vegetables, or meat, and bake for 15-20 minutes. It’s important to check on your pizza regularly to make sure it doesn’t burn! Once done baking, remove from oven and let cool before serving.
Conclusion
I trust that by trying out my earlier-mentioned methods, baking delicious and crispy pizzas without a pizza stone is very doable for everyone. By doing so, you can save money and time on ordering pizza delivery and still enjoy the same delicious results. So get out there and start baking! Happy pizza-making.